
The best way to tape an ankle for lateral instability is a rigid tape sequence: anchors, then stirrups, then figure-8s, then heel-locks. This combination limits inward rolling of the foot (inversion) better than a wrap or a single strip ever could, and it’s the technique most athletic trainers default to before practice or competition.
Here’s what this method gives you:
- Mechanical restriction of inversion, the motion behind most lateral sprains
- Added proprioceptive feedback through the skin, which helps your ankle sense position during movement
- Fast return-to-activity support without waiting on a brace to arrive or fit correctly
- The most benefit if you’ve sprained this ankle before — prevention research on taping and bracing shows relative risk reductions in a moderate range for recurrent sprains compared to no support at all
We’ll walk through materials, the full application, when kinesiology tape or a brace makes more sense, and what to watch for once the tape is on.
Key Takeaways
The rigid anchor-stirrup-figure-8-heel-lock sequence gives the strongest mechanical support for lateral ankle instability, while braces and kinesiology tape serve different, narrower roles.
| Point | Details |
|---|---|
| Best method for support | Anchors, stirrups, figure-8s, and heel-locks in sequence provide the strongest mechanical restriction of inversion. |
| Prep prevents problems | Clean, dry skin plus pre-wrap and pads prevents most blisters and skin stripping during removal. |
| Know the tradeoffs | Tape restricts motion well short-term; braces cost less and hold up better across a full season. |
| KT tape has a different job | Kinesiology tape supports proprioception and comfort but offers less mechanical restriction than rigid tape. |
| Escalate when needed | Persistent instability or swelling despite proper taping calls for a clinical evaluation, such as at Nortex Spine and Joint. |
This article is general information, not a substitute for advice from a qualified doctor. Consult a qualified healthcare professional about your own circumstances before acting on anything here.
Table of Contents
- What You Need and How to Prep the Skin
- How Do You Tape an Ankle Step by Step?
- What Are the Alternatives to Rigid Taping?
- Should You Tape Your Ankle or Use a Brace?
- How Long Should You Wear Ankle Tape?
- Build a Practice Routine for Faster Taping
- A Clinical Note on Taping and Rehab
- When Taping Isn’t Enough
- Sources
- FAQ
What You Need and How to Prep the Skin
Gather everything before you start. You’ll want pre-wrap (underwrap), rigid non-elastic athletic tape (zinc-oxide or standard white sports tape), scissors, heel and lace pads for friction points, tape adherent spray if your skin is oily, a basic skin cleanser, and an adhesive remover or oil for later.
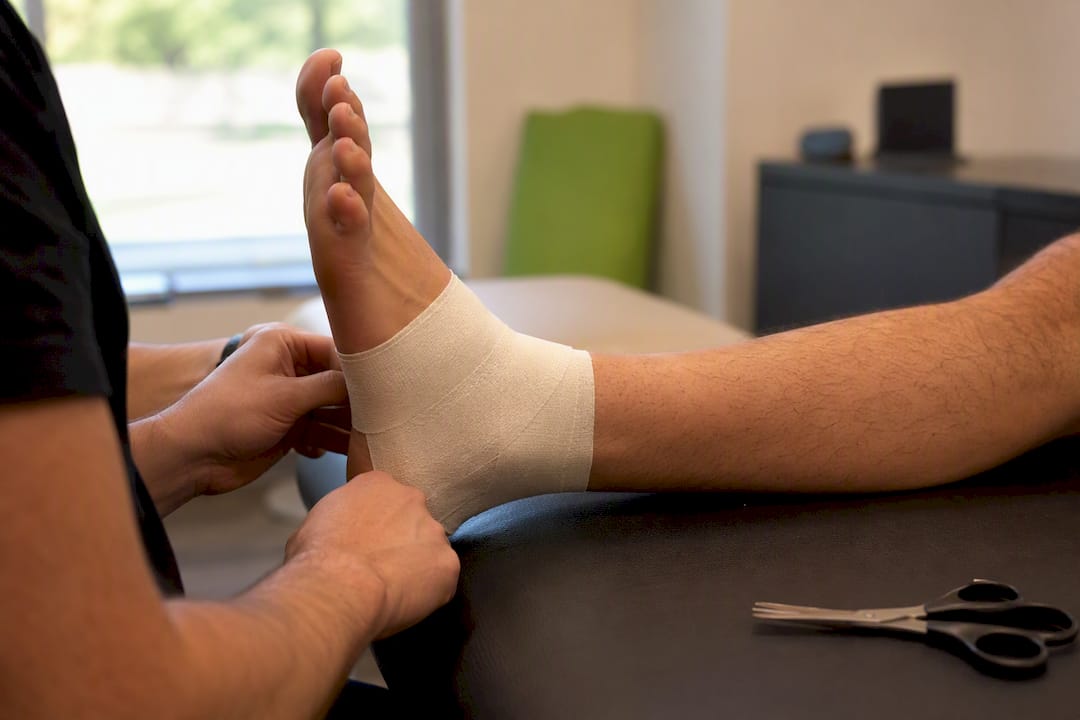
Clean and dry the skin first. If there’s noticeable hair, clip it. Apply pre-wrap smoothly in one direction, no wrinkles, no gaps at the heel or ankle bones. Position the foot in a neutral or slightly dorsiflexed position (toes pulled up toward the shin) for most lateral-sprain taping. That position matters more than people realize. Taping with the foot pointed down locks in the exact posture that causes re-injury.
Skip taping altogether if you see an open wound, active skin infection, poor circulation, or a known reaction to adhesive. Tape over broken skin and you’re inviting infection, not preventing one.
Pro Tip: A thin layer of pre-wrap plus a heel-and-lace pad under the tape prevents most blisters. Skin stripping usually happens on removal, not application, so don’t skip the prep step thinking it only matters for comfort.
How Do You Tape an Ankle Step by Step?
This is the core technique. Work with the foot at roughly 90 degrees, knee slightly bent, foot resting on a table or your lap if you’re taping yourself.
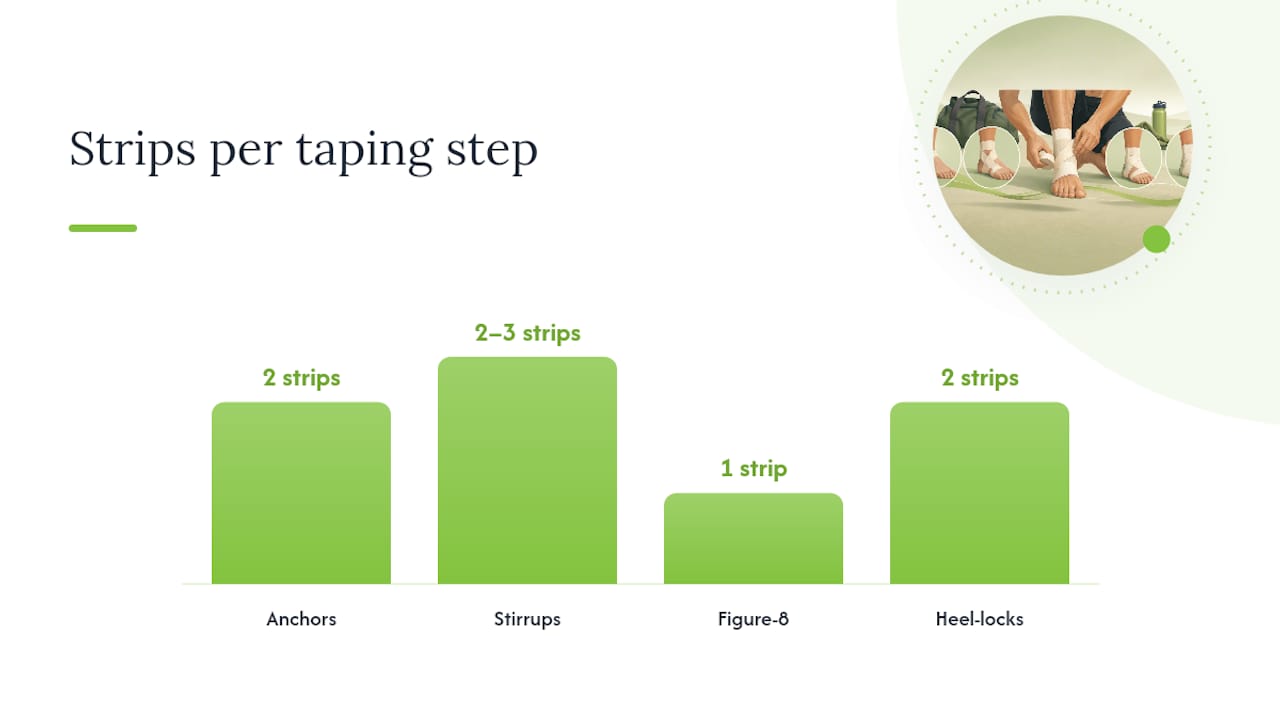
- Anchors. Place one strip around the lower calf, about a hand’s width above the ankle bone, and one around the midfoot at the base of the fifth metatarsal. These anchor everything that follows.
- Stirrups. Run 2 to 3 strips from the inside of the calf anchor, straight down under the heel, up the outside, and back to the anchor. Pull with moderate tension, not maximum. Overlap each stirrup by about half the tape’s width over the previous one.
- Figure-8s. Starting at the top of the foot, angle the tape down across the outer ankle, under the arch, and back up across the top, forming a figure-8 pattern that locks the ankle against rolling inward. This is the strip doing most of the work against inversion, and it’s why nonelastic tape measurably increases fibularis longus muscle activity during ankle perturbation compared to no tape at all.
- Heel-locks. Two strips, one starting medially and one laterally, wrapping around the heel in opposing diagonals to close off the back of the ankle. Pull firm, not tight enough to blanch the skin.
- Closure strips. Finish with horizontal strips covering any exposed pre-wrap edges, smoothing everything flat against the skin.
If you’re taping your own ankle, a mirror and a seated position with your foot propped on a low stool make this far easier. A second set of hands speeds it up, but plenty of athletes learn to do this solo.
Before you send someone back out to activity, check capillary refill: press a toenail, release, and confirm color returns within about two seconds. Ask about numbness or tingling. If either is off, cut the tape loose immediately and reapply looser.
Pro Tip: Keep a routine checklist taped inside your kit bag: anchors, stirrups, figure-8, heel-locks, circulation check. Repetition is what makes this fast. Most trainers can do a full application in under three minutes once they’ve done it fifty times.
What Are the Alternatives to Rigid Taping?
Rigid tape isn’t always practical, and it isn’t the only reasonable option.
- Pre-cut strips save time for solo application, especially for stirrups and anchors, and they’re worth keeping in a kit if you tape frequently.
- Kinesiology tape (KT) is elastic rather than rigid, and it works differently. It’s applied in longer, less tensioned strips along the muscle or ligament line rather than in a locked cage pattern. A systematic review of kinesiology tape for ankle instability found it can help with postural control and comfort, but it likely doesn’t provide the mechanical restriction rigid tape does. Think of it as support for sensation, not a structural brace.
- Low-profile wrapping inside a shoe can buy you a few minutes when a full application isn’t feasible, but it trades support for speed.
Pro Tip: If you’re taping before every single practice this season, that’s a signal to consider a lace-up or semirigid brace instead. It’s often just as effective and far more efficient over months of repeated use than rebuying tape and re-prepping skin every day.
Should You Tape Your Ankle or Use a Brace?
Both tape and braces reduce recurrent sprains in athletes with a prior injury, and a systematic review of external ankle supports found no consistent winner between the two across studies, though the overall evidence quality is mixed.
The practical differences show up in daily use, not raw effectiveness:
- Support level: Rigid tape restricts motion mechanically; braces do too, and more consistently over repeated wear.
- Best use case: Tape suits occasional games or short-term protection after injury; braces suit a full competitive season.
- Wear duration: Tape loosens within a few hours of activity; braces hold their support wear after wear.
- Ease of application: Tape takes a few minutes and skill; a brace takes seconds.
- Seasonal cost: Cost-benefit analyses suggest taping across a season can run roughly three times more expensive than a single reusable brace, once you count tape, pre-wrap, and staff time.
Neither replaces the third leg of the stool: neuromuscular training. Guideline resources from the APTA consistently pair external support with balance and strength work, not as a substitute for it.
How Long Should You Wear Ankle Tape?
Rigid tape typically holds useful support for a single practice or game, roughly 3 to 6 hours of active use, before it loosens with sweat and movement. Kinesiology tape is designed to stay on longer, often 3 to 5 days, since it moves with the skin rather than resisting it.
Re-tape when you notice loss of adhesion, new swelling, or after heavy sweating soaks through the pre-wrap. Watch for skin irritation, blister formation, or a tourniquet effect, where the ankle below the tape looks pale or feels cold. Loosen it right away if you see that.
To remove tape safely, cut along the shin with bandage scissors rather than peeling, and use an adhesive remover if the skin resists. Peeling tape off dry skin is the single most common cause of skin stripping.
Taping is a temporary, supplemental measure. If instability, pain, or swelling persists despite proper taping and rest, that’s not a taping problem anymore. It’s a signal to get the ankle evaluated.
Build a Practice Routine for Faster Taping
Watch one clean demonstration, then practice the anchor and stirrup sequence on a partner or a mannequin foot. Time yourself. Once you’re consistent, simulate a real pregame scenario: full application, circulation check, under five minutes.
- Practice daily for one week when you’re learning
- Drop to a weekly refresher once you’re consistent
- Keep a short mental checklist: anchors, stirrups, figure-8, heel-locks, circulation check
Pro Tip: Speed comes from muscle memory in your hands, not from rushing the tension. Slow down the first ten reps and the fast, clean version follows naturally.
A Clinical Note on Taping and Rehab
Taping works best as one piece of a larger plan, not the whole plan. It fits alongside balance work and progressive strength training, which is where lasting stability actually comes from.
If you’re taping the same ankle before every session months after the original injury, that’s chronic instability talking, not a taping failure. At that point, a brace or a structured rehab program usually serves you better than daily tape.
Pro Tip: If your ankle still gives way or swells despite consistent taping and rest, that’s worth a clinical assessment rather than another roll of tape.
What Patients Actually Tell Us
Many patients come in after months of self-taping, wrapping, or trying a brace they found online, and the ankle still rolls under them occasionally. Taping genuinely lowers re-injury risk for people with a history of sprains, but it isn’t a fix for a ligament that never fully healed. Realistic expectations matter here: expect protection and confidence, not correction of the underlying laxity.
When Taping Isn’t Enough
Get evaluated if you suspect a fracture, can’t bear weight at all, or notice the ankle keeps giving way despite consistent taping and rehab work. Persistent swelling weeks after an injury is another sign something deeper needs attention.
At Nortex Spine and Joint, we see this pattern often: an athlete or active adult who’s taped and braced their way through a season, only to find the instability keeps returning because the underlying ligament or joint issue was never directly treated. Taping and bracing manage symptoms in the moment. They don’t repair tissue. If your ankle instability, chronic ache, or swelling isn’t resolving with conservative measures, a clinical evaluation can identify whether you’re dealing with ligament laxity, joint irritation, or something that responds well to non-surgical options like PRP therapy. Our team also covers related joint and ACL conditions when instability extends beyond the ankle itself. If you’ve been taping the same ankle for months without real improvement, schedule an assessment and let’s find out what’s actually driving it.
Sources
- External ankle supports (systematic review) — NCBI Bookshelf
- Optimising ankle sprain prevention: a critical review and practical appraisal — PubMed
- Taping and bracing in the prevention of ankle sprains: current concepts — PMC
- Effect of tape on fibularis longus muscle activity — JOSPT (2011)
FAQ
Does taping an ankle really help?
Yes, particularly if you’ve sprained that ankle before.
Can kinesiology tape help with ankle pain?
KT tape can support comfort and proprioception, but it doesn’t restrict motion the way rigid tape does, so it’s better suited to mild instability or pain relief than acute mechanical support.
Is taping good for a sprained ankle?
Taping helps manage a mild to moderate sprain and supports return to activity, but a suspected fracture, inability to bear weight, or worsening swelling needs clinical evaluation before any taping.
Is it better to wrap a sprained ankle or leave it unwrapped?
Functional support like tape or a brace is generally preferred over a simple compression wrap for acute lateral sprains, since wraps alone offer little mechanical restriction.
How often should I re-tape my ankle?
Re-tape once you notice loosened adhesion, new swelling, or heavy sweating has soaked through, which for rigid tape often means once per practice or game session.